Integrate the Hyper Arduino library
This page will walk you through the steps necessary to get your first sensor readings recorded with Hyper’s platform.
Make sure you have a working Arduino development kit before following the instructions on this page.
Load the library in Arduino IDE
Instructions to start using the library in Arduino IDE:
-
Download the library ZIP archive provided by Hyper to your computer.
-
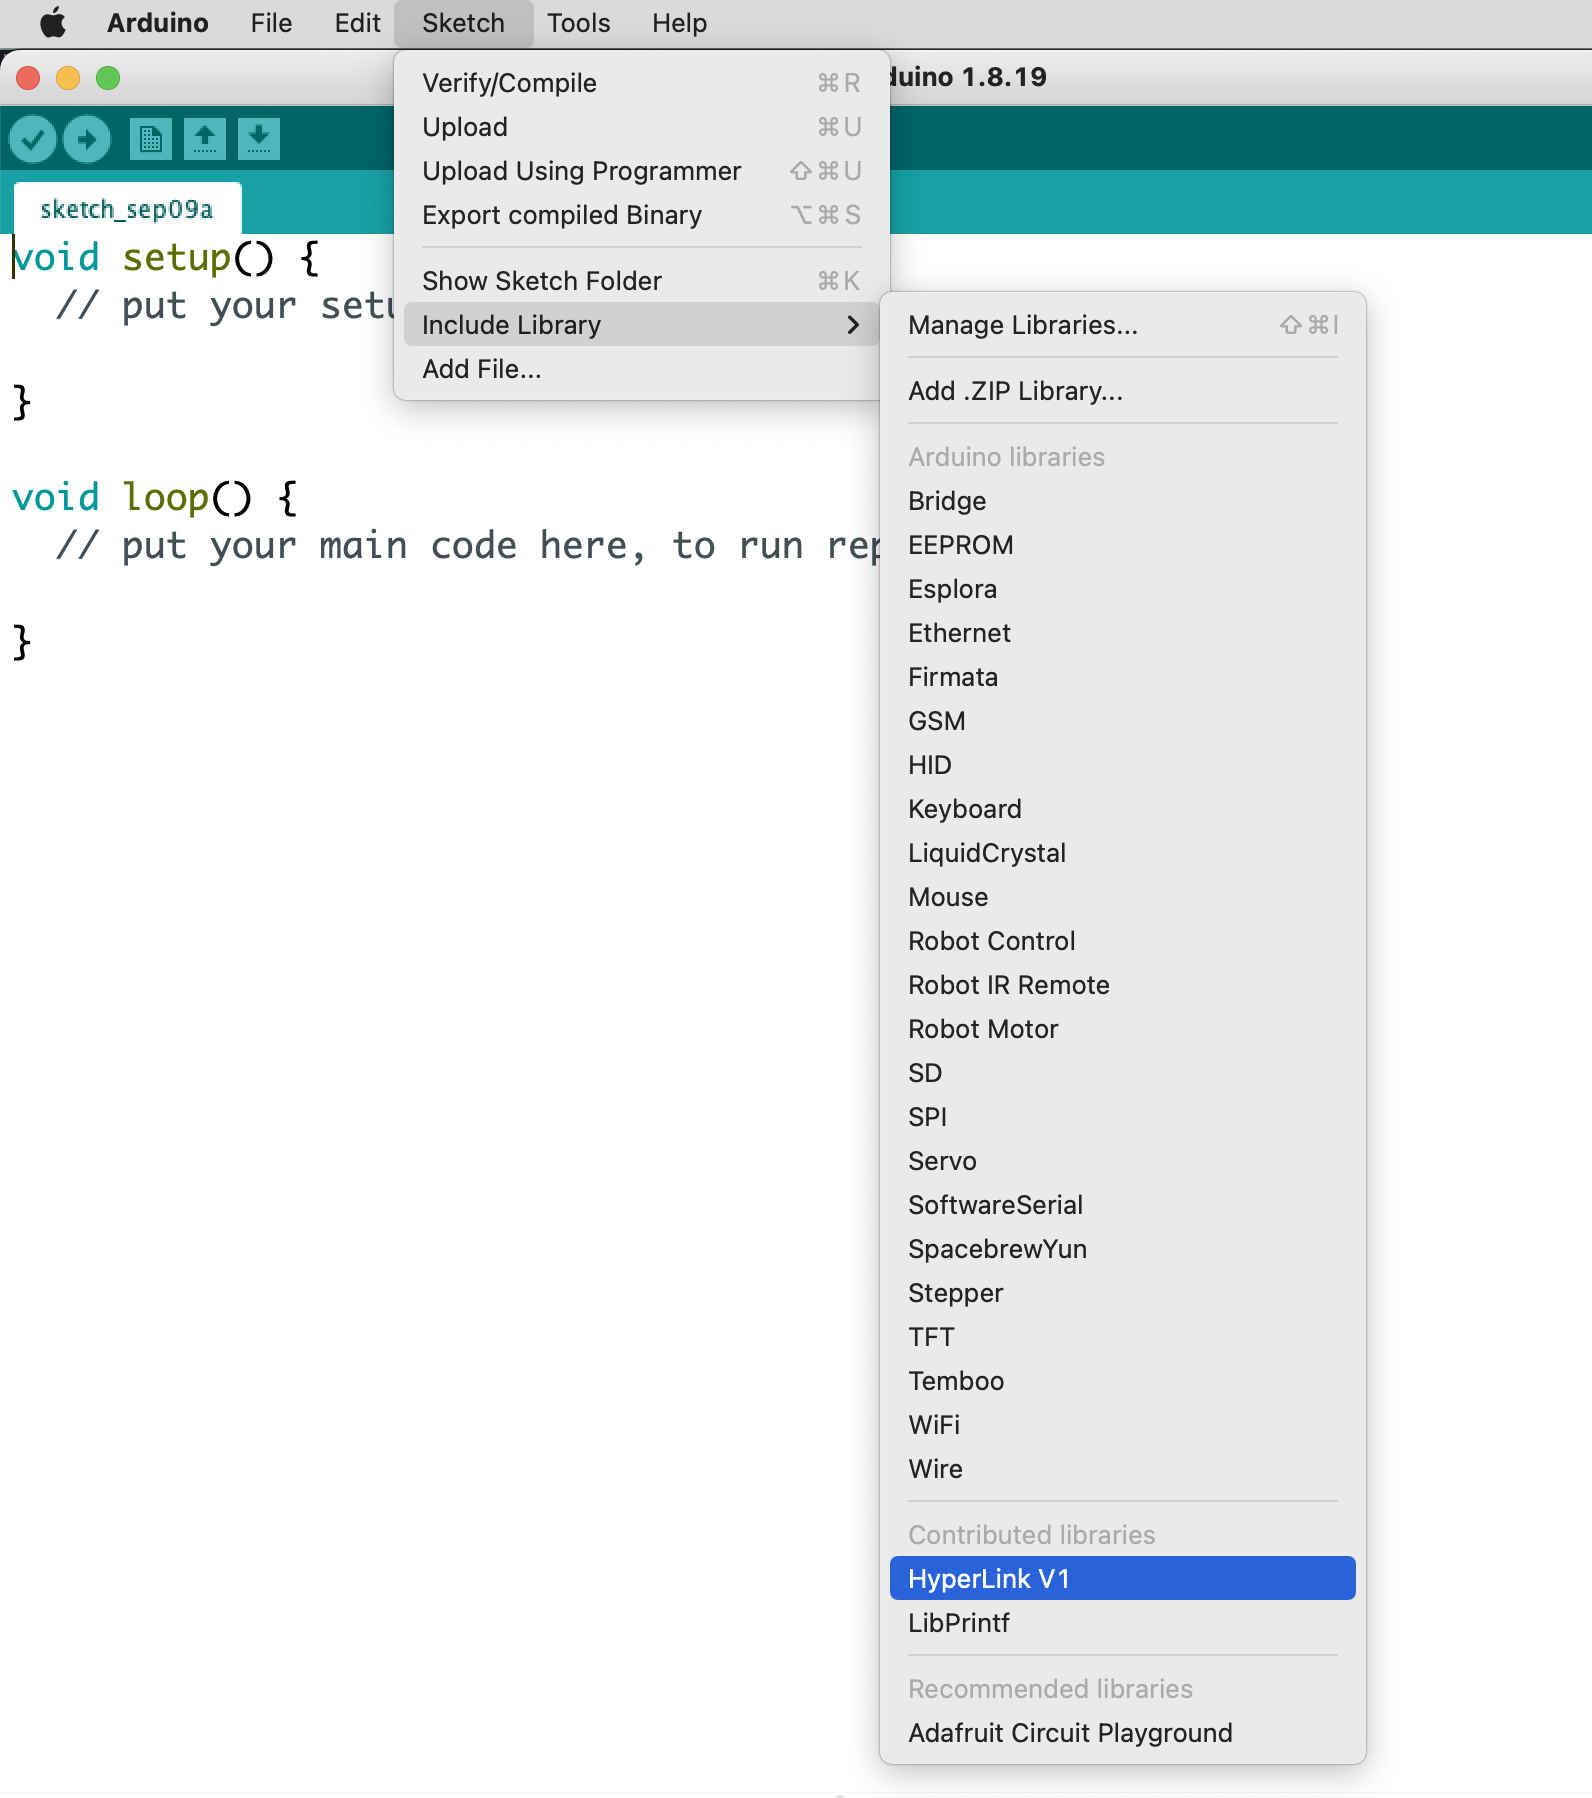
Open Arduino IDE and select in the menu. Select the library ZIP file and the library should be loaded.
-
Start a new Arduino project and select in the menu (as illustrated in Figure 1 below).
| You can find complete examples of device integration in the menu. |
Once completed you will see a new include line in the source code:
#include <HyperDeviceXXI2CSlave.h>
The include file name will contain the identifier of your device class instead of XX.
|
You can now define and configure your device using the included library API.
Define the global device variable
Define a variable for your Hyper device in the global scope to make it easy for your to access the device anywhere in your code. Remember to replace XX with your device class identifier.
// Replace XX with your device class identifier (provided by Hyper).
HyperDeviceXXI2CSlave hyperDevice;
Setup the device identifier and bind write attributes
All devices must have a unique identifier composed of 6 hex characters. If possible use your boards MAC address or find an equivalent unique identifier.
In addition to publishing sensor values, your Hyper device can also receive commands from the server to trigger actions. This is achieved by "binding" a function to a write attribute as illustrated below. But if you only want to record sensor readings you can safely omit the attribute bindings.
void setup() {
  // Set device id.
  // The provided id is just a placeholder you can use for testing.
  const uint8_t deviceId[6] = {0xFF, 0xFF, 0xFF, 0x00, 0x00, 0x01};
  hyperDevice.begin(deviceId);

  // Optional: bind write attributes.
  hyperDevice.bindMyAttribute1(onMyAttribute1Update);
}
Record read attribute changes
In the loop function of your Arduino-compatible device, you can make any necessary call to the low-level APIs to read the measurements from your sensor. When you have the final value of the sensor measurement you can call the "set" function for the attribute that represents that sensor value.
void loop() {
  // Read your sensor value.
  int adcVal = analogRead(A0);

  // Record the values for your read attributes.
  // Note: your "set" function name might be different depending on the
  // name of your attribute.
  hyperDevice.setTemperature1(adcVal); (1)

  delay(1000);
}| 1 | The included header has setter functions for all the attributes of your device. |
Having completed these code changes your project is ready to start publishing read attribute values and processing write attribute updates from the server.
Connect and flash the Arduino board
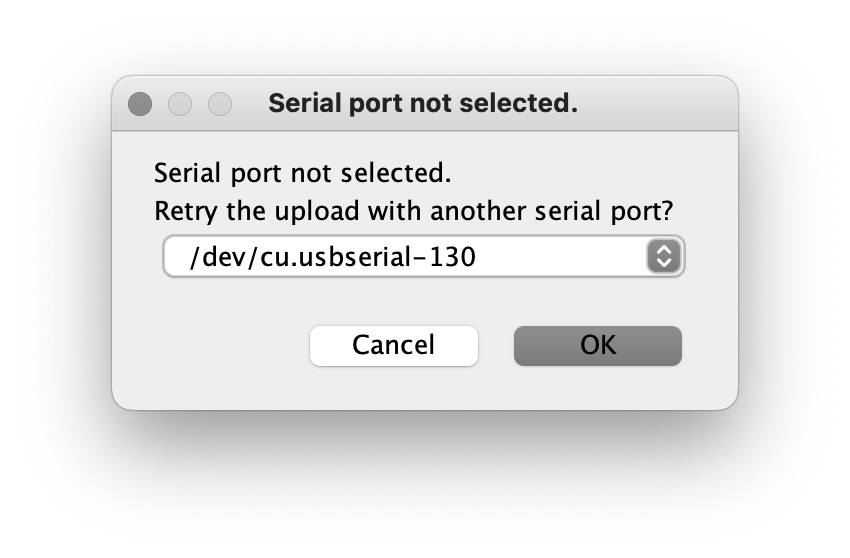
Assuming your Arduino-compatible board is connected and configured, you can now upload the code to the board. The IDE will show the "Done uploading" message in the status bar.
If you haven’t previously selected the port of the board, the IDE will prompt you with a port selection window. Typically your board will look like /dev/cu.usbserial-130.
|
Having completed these steps you can connect the Hyper Link WiFi device to your Arduino-compatible device (as described on the "xref:integrate-hyper-arduino-library.adoc" page) and start monitoring the incoming data from your sensor.
The "Configure Hyper Link WiFi device" page will help you setup the Link device.